Player Origins In Use
Once you have set up the Player Origins, you will notice some additional options available inside activities, lifecycles, and email templates.
🚀 Activities
Once Player Origins is enabled and set up correctly, you can select, on an activity level, which origin to include in each player engagement you send to your players.
Any set-up and enabled origins will be visible and available to be included when you create a new activity. From inside a new activity, click to select which player origins you want to enable for the player engagement you're about to set up. This will result in the activity being triggered to any player that belongs to the selected origins.

Select Player Origins inside an activity
Select Player Origins inside an activity
Segments
With Player Origins selected, the segment will display a segment count that is broken down into each origin. This is to let you know the number of players that fall into each origin.

Segment per player origin
Segment per player origin
In the background, the segment builder will automatically add the OR condition for each selected player origin to your selected segment.

Segment builder
Segment builder
📧 Email Templates
When setting up an email action inside an activity, it is only possible to select an email template that has been enabled for all of the player origins that you've selected to include in the activity.
If an email template has not been enabled for one or more of the player origins selected in your activity, the template will not appear on the dropdown menu.
On the image below, on the right-hand side, you can see the icons of the origins that have been enabled for each available email template in the dropdown menu.
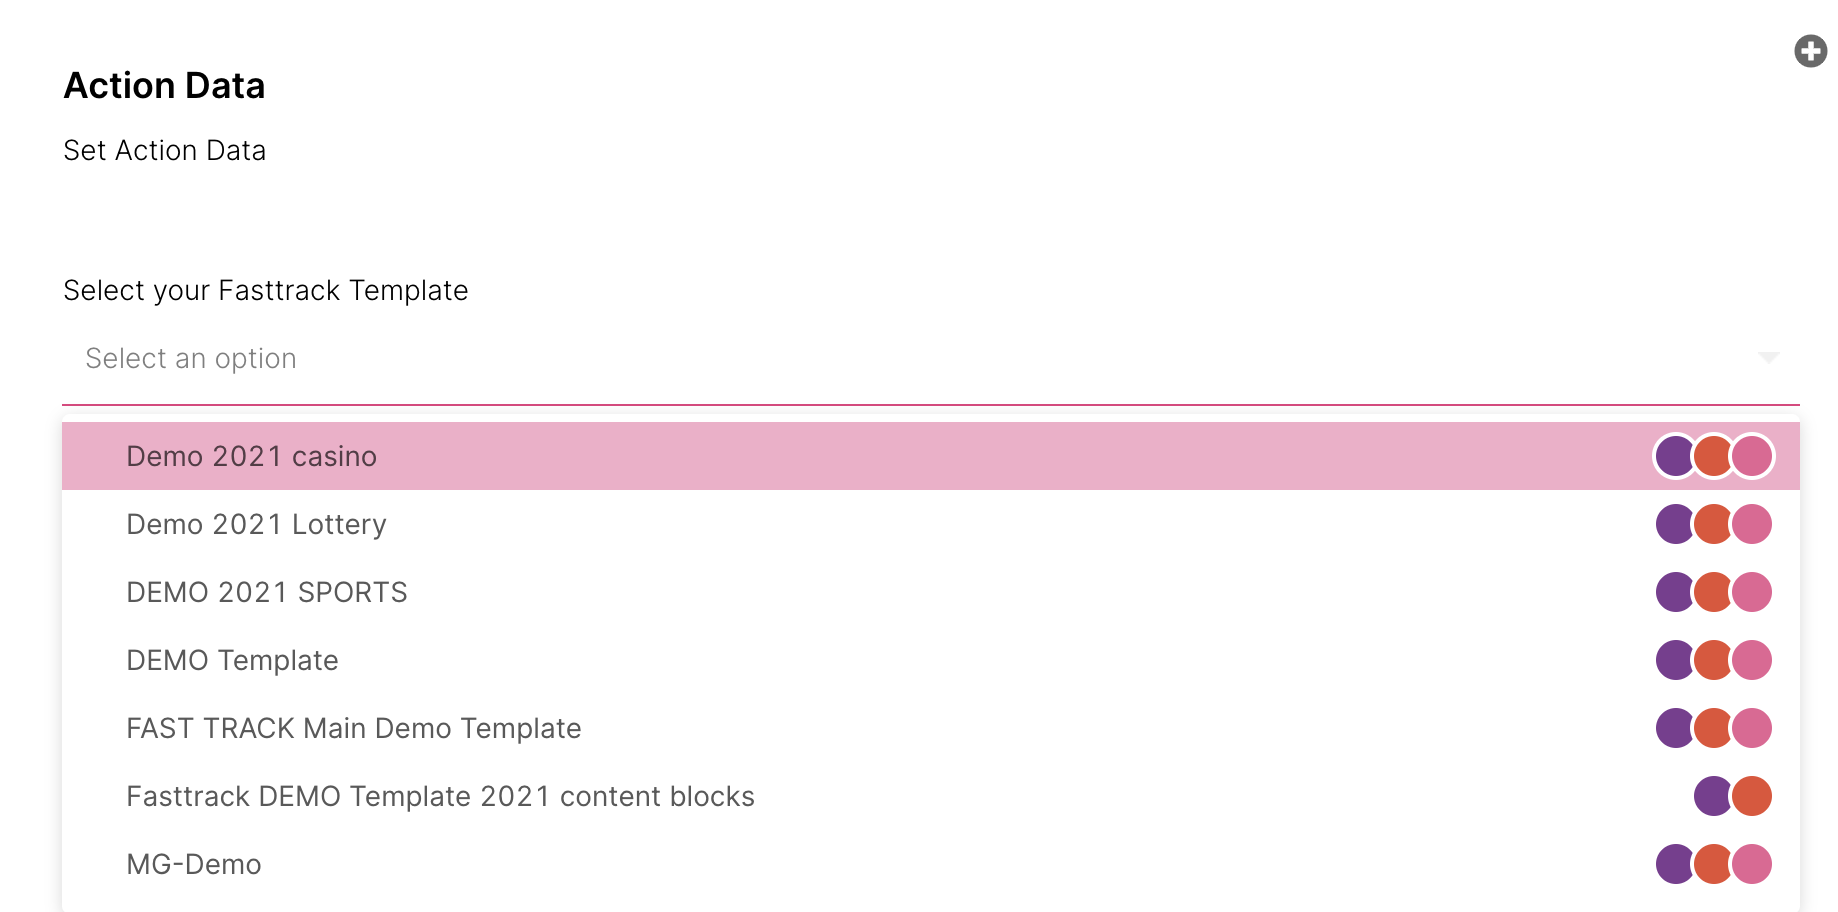
Email template selection
Email template selection
Assigning email templates to be available for player origins is handled in the Email Templates page of the CRM menu. Simply select the Player Origin tab at the top of the page, locate your email template and Add Player Origin.

Assign player origin to email template
Assign player origin to email template
Content Blocks & FT Conditions
Take advantage of the content blocks and FT conditions functionality inside the email template builder to be able to set up email templates that display dynamic content for multiple audiences.
✅ Quality Assurance
When creating player engagement for multiple origins, it is important to have full visibility of what will be sent and how it will look for each audience. For this reason, each targeted player origin is required to be thoroughly QA'd and signed off.
As you can see from the image below, the first few sections are common factors for the origins and will be signed off simultaneously for all of them. Whilst the action groups, actions, and the control group for each player origin are grouped into Action Per Origin

Quality Assurance view
Quality Assurance view
Simply select the button for each origin. A new panel will open displaying any action groups, actions, and a potential control group that needs to be QA'd.

QA'd Actions for Player Origin 1
QA'd Actions for Player Origin 1
💜 Lifecycles
Once Player Origins is enabled and set up correctly, you can select, at a lifecycle project level, which origin to include in the player engagements you send to your players.
Any enabled origins will be visible and available to be included when you create a new lifecycle.
Entry Conditions
Player Origins are assigned during the Entry Condition set-up process and specifically when defining the lifecycle entry segment.
Lifecycle projects come in a variety of different formations; automated, set up for a specific date and time, built from scratch, or originating from a pre-defined template. Player Origins can be assigned regardless of these variations and will look as in the image below;

Player Origins in Lifecycle Entry Conditions
Player Origins in Lifecycle Entry Conditions
The rest of the lifecycle building process looks the same as before, taking into account the same considerations mentioned in the above sections with regards to activities, activity segmentation, and email templates.
If you would like more information about how to build and manage lifecycle projects, you can find some extra reading here.
Launch Lifecycle
With Player Origins enabled, there is an extra step of the launch lifecycle process that requires you to confirm the selected player origins.

Verify and launch
Verify and launch
It is also possible to make a change to the player origin selection at this point. You can select to add a new origin and/or remove an origin from the selection that was made when defining the entry conditions.
Note: Please be aware that making changes to the player origin selection at this stage may result in problems launching the lifecycle.
For example, You select to add a player origin that is not associated with the selected email template used inside the lifecycle activities. In this instance, you will receive an error message that will prevent the lifecycle from being launched.
Here you need to move the lifecycle version back to the development stage and make changes to the email set-up (select an appropriate email template), QA the lifecycle version again and launch to production.
📈 Performance
In the Activity Performance Dashboard and the Lifecycle Conversion Results, you can filter results based on the Player Origin. Simply select the player origin you wish to see the results for and run, to see specific conversion data for that brand.

Filter Player Origin on Activity Performance Dashboard
Filter Player Origin on Activity Performance Dashboard
Note 🧠 : If you want to see the overall performance results across all origins, simply do not filter any Player Origin.